Welcome to your new iPhone adventure! Switching from your Android device to an iPhone might seem daunting, but it’s actually much simpler than you think.
The process works the same whether you’re getting a budget-friendly model or the latest premium iPhone. Your valuable information moves securely between devices.
Most smartphones use Android software unless they’re iPhones or Huawei devices. This includes popular brands like Samsung, Sony, and Google phones.
Modern transfer methods have made moving your content incredibly straightforward. You’ll be enjoying your new iPhone with all your important stuff intact in no time!
This guide will show you both official Apple solutions and helpful third-party tools. Proper preparation ensures a smooth transition experience.
Key Takeaways
- Switching between Android and iPhone is simpler than most people expect
- The transfer process works consistently across all iPhone models
- Most smartphones run on Android unless they’re iPhones or Huawei devices
- Modern methods have simplified what used to be a complex process
- Both official Apple tools and third-party options are available
- Proper preparation is key to a successful migration
- You can keep all your important information when making the switch
What You’ll Need Before You Start the Transfer
Proper preparation is your secret weapon for a smooth transition between these different operating systems. Taking a few minutes to get everything ready will save you time and prevent headaches during the actual migration process.
Ensure Both Phones Are Charged or Plugged In
Your migration could take some time depending on how much content you’re moving. A power interruption mid-process might cause issues with your valuable information.
Keep both devices connected to power sources throughout the entire operation. This prevents battery drain from disrupting your transfer data between platforms.
“The most successful migrations happen when both devices maintain consistent power throughout the process.”
Connect to a Stable and Private Wi-Fi Network
Your migration relies on a strong wireless connection rather than mobile data. Position yourself near your router for the best signal strength during this operation.
Public networks pose security risks for your personal details. Always use a trusted private connection when moving between different mobile platforms.
Both your current android device and your new iPhone must join the same network. This creates a secure pathway for all your content.
Download the Necessary Apps in Advance
You’ll want the Move to iOS application ready on your current phone before beginning. This special tool facilitates the seamless movement of your information.
Having everything prepared in advance prevents last-minute searching and delays. Your essential apps and their associated content will transition more smoothly.
Check that you have the latest version of any required applications. Updated software typically offers better performance and fewer issues.
| Preparation Item | Why It Matters | Best Practice |
|---|---|---|
| Power Connection | Prevents interruption mid-process | Keep both phones plugged in |
| Wi-Fi Network | Ensures secure, fast data movement | Use private network near router |
| Required Apps | Facilitates the migration process | Download Move to iOS beforehand |
| Time Allocation | Allows complete uninterrupted transfer | Set aside 30-60 minutes |
| Content Review | Helps identify what to move | Check storage on current device |
Following these simple preparation steps sets the stage for success. You’ll appreciate the effort when everything moves over without any hitches.
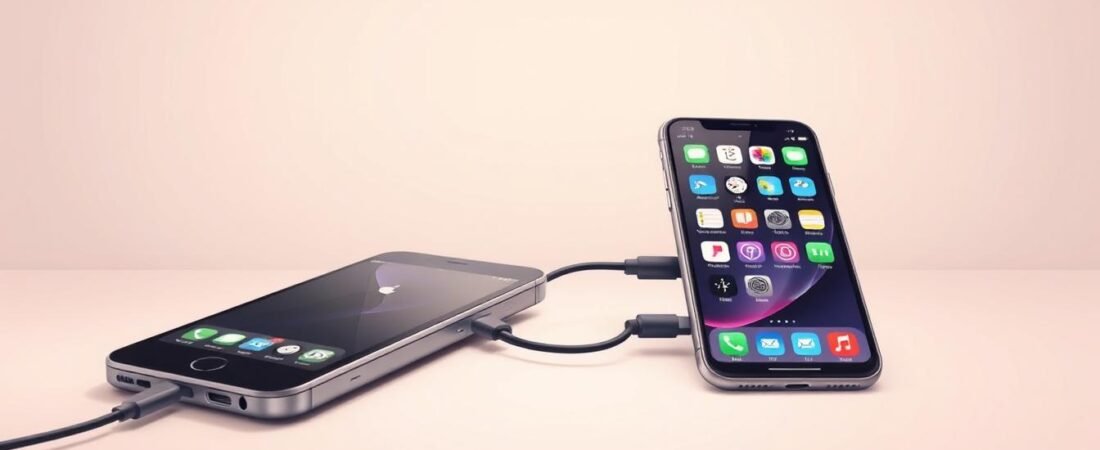
How to Transfer Data from Android to iPhone Using Move to iOS
Getting started with your iPhone setup opens the door to Apple’s dedicated migration tool. This official application streamlines the entire process between different mobile platforms.
The Move to iOS solution works exclusively during your initial device configuration. You cannot access this feature after completing your setup.

Step 1: Begin Setup on Your New iPhone and Get the Code
Power on your fresh Apple device to initiate the setup wizard. Follow the prompts until you reach the Apps & Data screen.
Select “Move Data from Android” from the available options. Your device will generate a unique security code for authentication.
This code ensures a protected connection between your two phones. Write it down or remember it for the next step.
Step 2: Download and Open the Move to iOS App on Your Android
Visit Google Play Store on your current mobile device. Search for and install Apple’s Move to iOS application.
Launch the program once installation completes successfully. The interface will guide you through the connection process.
Ensure both devices remain connected to the same Wi-Fi network. This creates a secure pathway for your information.
Step 3: Enter the Code and Establish a Secure Connection
Input the authentication code displayed on your Apple device. The application will verify this number before proceeding.
Your phones establish a direct wireless link for the migration. This private connection protects your personal details during movement.
The system may take a moment to confirm the successful pairing. Wait patiently until both devices acknowledge the secure link.
Step 4: Select Your Data and Initiate the Transfer
Choose which content categories you want to move between platforms. Available options include messages, photos, and contact lists.
Select your Google Account to ensure immediate email functionality. This saves time configuring your messaging applications later.
Confirm your selections and begin the migration process. The duration depends on your content volume and network speed.
“Large photo and video collections significantly extend transfer times. Patience ensures everything moves correctly.”
| Data Type | Transfer Time Estimate | Special Considerations |
|---|---|---|
| Contacts & Messages | 2-5 minutes | Transfers completely |
| Google Account | Instant setup | Enables immediate email access |
| Photos (500 items) | 15-30 minutes | Depends on image sizes |
| Videos (1GB) | 20-40 minutes | Requires stable connection |
| Complete Transfer | 30-90 minutes | Based on total content volume |
Your migration continues automatically once initiated. Avoid interrupting the process to prevent data loss or corruption.
The Move to iOS method represents the most integrated approach available. Apple designed this specifically for platform transitions.
Using a Dedicated Transfer Tool Like MobileTrans
Professional transfer software brings advanced features to your migration process. These specialized applications offer flexibility beyond standard methods.
MobileTrans stands out among third-party options for cross-platform moves. It handles various content types while maintaining quality and security.
Why Choose a Third-Party App for Your Transfer
Specialized software provides broader support for different file formats. You can move content that official methods might not handle.
These tools often work with more device brands and models. They don’t require factory resets or specific setup timing.
You maintain control over what gets moved between devices. Selective transfers save time and storage space on your new phone.

MobileTrans preserves your media’s original quality during the process. Photos and videos keep their resolution and format intact.
The application uses direct device-to-device connections for security. Your sensitive information never gets stored on third-party servers.
“Encrypted transfers ensure your personal details remain protected throughout the migration process.”
Desktop versions offer additional capabilities like backup features. These extra functions provide more value for your investment.
Step-by-Step Guide with MobileTrans
Begin by downloading the software on your computer. Both Windows and Mac versions are available for installation.
Connect both your Android device and iPhone to your computer. Use quality cables to ensure stable connections throughout.
Launch MobileTrans and select the “Phone Transfer” option. The interface will detect both connected devices automatically.
Choose which content categories you want to move between platforms. Available options include:
- Contact lists and message history
- Photo galleries and video collections
- WhatsApp conversations and media
- Music files and document folders
Review your selections before starting the migration process. Confirm everything looks correct to avoid unnecessary transfers.
Initiate the move and wait for completion. The duration depends on your content volume and connection speed.
| Feature | MobileTrans Advantage | Benefit |
|---|---|---|
| Data Types | 10+ content categories | Comprehensive migration |
| Security | Local encrypted transfer | No cloud storage |
| Selectivity | Choose specific files | Customized move |
| Compatibility | Works across brands | Universal solution |
| Quality | Original format preservation | No quality loss |
MobileTrans represents a premium option for your platform switch. The investment often proves worthwhile for complex migrations.
Consider your specific needs when choosing between methods. This tool excels where official solutions might have limitations.
Transferring Specific Data Types Individually
Sometimes you only need to move specific information rather than everything at once. These targeted approaches give you precision control over your migration.
You might want to keep certain files while leaving others behind. Selective methods work perfectly for this scenario.
Moving Your Contacts with a Specialized App
Contact Transfer apps provide a dedicated solution for your address book. These Windows applications create direct connections between both phones.
Install the software on your computer and connect both devices. The program detects your contacts automatically.
Unlike some methods, this works even after completing your initial setup. There’s no risk of information loss during the process.
Your contact list moves within minutes rather than hours. This saves significant time compared to full migrations.
Syncing Your Photos and Files via Google Drive
Google Drive offers a free cloud-based option for your media and documents. This method works across all platforms and devices.
Install the application on both your Android and Apple devices. Sign in with the same Google account on each.
Upload your photos, videos, and files from your current device. Then download them directly to your new phone.
You can also sync information through your device settings. Enable contact, calendar, and photo synchronization on both phones.
This approach maintains accessibility across all your devices. Your information stays available wherever you need it.
“Cloud services provide convenient access but require stable internet connections for optimal performance.”
Remember that large files may take time with slower connections. This is particularly important consideration in areas with variable internet speeds.
Manually Emailing Important Documents to Yourself
Email provides the simplest method for individual files and documents. This requires no additional applications or installations.
Use the share feature on your Android device to email files to yourself. Then open your email on your new device to download attachments.
This method works for documents, photos, and other supported file types. It’s completely platform-independent and universally accessible.
The email approach excels for quick transfers of critical files. You can send important documents immediately without waiting for larger transfers.
| Method | Best For | Considerations |
|---|---|---|
| Contact Transfer App | Complete contact lists | Requires computer with Windows |
| Google Drive Sync | Photos, files, some data types | Internet speed affects transfer time |
| Email Method | Individual important files | Attachment size limitations apply |
Each approach has specific strengths for different situations. You might combine methods for a comprehensive strategy.
Consider your specific needs and available resources when choosing. The right method depends on what you’re moving and your technical environment.
Essential Steps to Take After Your Data is Transferred
Congratulations on completing your migration! Your valuable information has successfully moved between platforms. Now it’s time to ensure everything works perfectly on your fresh device.
This phase makes your transition complete and comfortable. You’ll verify your content and customize your experience.
Verifying Your Transferred Information
Check your contact list first to confirm all entries moved correctly. Open your Phone app and scroll through your address book.
Review your photo gallery for complete image collections. Look for any missing pictures or videos from your previous device.
Test your message history by opening the Messages application. Your conversations should appear exactly as they were.
Ensure your calendar events and email accounts transferred properly. Sync any cloud services to access your latest files.
Thorough verification prevents surprises later. Take time to examine each category carefully.
Downloading Your Essential Apps from the App Store
Visit the App Store on your new iPhone to install your favorite applications. Popular services like WhatsApp and Facebook are readily available.
Search for each app you used on your previous device. Download them one by one to organize your home screen.
Sign into each application using your existing accounts. Your messages and content will sync automatically.
Cloud backups restore your information within each app. This brings your familiar experience to the new platform.
Finalizing Your iPhone’s Settings
Open your Settings application to customize your device. Adjust notifications, sounds, and display preferences to match your style.
Configure security features like Face ID or passcode protection. Set up Apple Pay for convenient payments.
Explore iCloud options for automatic backups. This protects your information going forward.
Apple Stores offer free personal setup sessions if you need assistance. Their experts help with any remaining questions.
“Customizing your settings makes your device truly yours. Take time to explore all options available.”
Test every feature to ensure proper functionality. Your complete transition depends on everything working smoothly.
Enjoy your new iPhone experience with all your important information intact. The platform change becomes seamless when done correctly.
Troubleshooting Common Data Transfer Issues
Even the smoothest migrations can hit occasional bumps. Don’t worry if your move between platforms encounters challenges.
Most problems have straightforward solutions. You can typically resolve issues without losing progress.
This section addresses frequent concerns during platform transitions. You’ll find practical fixes for various situations.
What to Do If the Transfer Fails or Is Interrupted
First, check both devices remain powered and connected. Restart the process if necessary.
Ensure your Wi-Fi signal remains strong throughout. Move closer to your router if possible.
Verify you’re using the latest version of required software. Updates often fix compatibility problems.
Never disconnect devices during active migration. This prevents file corruption.
If using Move to iOS, you might need to reset your fresh device. This clears any partial transfer attempts.
“Most failed transfers simply need a fresh start with verified connections. Patience typically resolves the issue.”
Managing Very Long Transfer Times
Large media collections naturally take more time. Video files particularly extend duration.
Position both phones near your Wi-Fi source. This maximizes signal strength for faster movement.
Avoid using either device during the process. Background activities can slow operations.
Consider transferring your content in smaller batches. This approach helps manage expectations.
Late evenings often provide better network speeds. Schedule your migration during off-peak hours.
Resolving Wi-Fi and Connection Problems
Wireless issues frequently disrupt platform transitions. Several solutions exist for connectivity problems.
First, restart your router and both devices. This clears temporary network glitches.
Try forgetting the network on both phones. Then reconnect using fresh credentials.
Consider using a different frequency band if available. Some devices prefer 5GHz over 2.4GHz connections.
Mobile hotspot alternatives sometimes work better. Use your existing phone’s hotspot as a backup.
| Problem Type | Immediate Solution | Prevention Strategy |
|---|---|---|
| Failed Transfer | Restart both devices | Verify software updates beforehand |
| Slow Progress | Move closer to router | Transfer during off-peak hours |
| Wi-Fi Dropout | Use mobile hotspot | Check router stability in advance |
| Authentication Errors | Verify security code | Ensure same network on both devices |
| Partial Transfer | Reset new device | Maintain constant power connection |
Security remains important during troubleshooting. Always use private networks for your migration.
Malicious software can target vulnerable transfers. Stick to trusted applications and connections.
Seek professional help if problems persist. Apple Support provides free assistance for platform transitions.
Alternative methods exist if one approach fails completely. Cloud services or computer-based transfers often succeed.
Conclusion: Choosing the Best Method for Your Switch
Selecting the right approach depends on your needs and technical comfort. Apple’s Move to iOS app works great during initial setup but has limitations.
Third-party software offers more flexibility for selective moves. It handles various files without requiring a reset.
Cloud services provide accessibility across devices. They sync your information but may take time with large collections.
Consider security, cost, and reliability when deciding. Combine methods if needed for a complete migration.
Your successful transition ensures all important content moves securely. Enjoy your new device with everything intact!
FAQ
Can I transfer my apps from Android to iPhone?
Unfortunately, you can’t directly transfer apps due to different operating systems. However, you’ll want to download your essential apps from the App Store on your new iPhone after the transfer is complete.
How long does the data transfer process usually take?
The time varies based on how much information you’re moving. Smaller transfers might take minutes, while larger ones with many photos and videos could require an hour or more. Make sure both devices stay connected during this process.
Will my text messages transfer from Android to iPhone?
Yes! When you use the Move to iOS app, it can transfer your messages along with contacts, photos, and other important data. Just make sure to select messages during the transfer process.
What if I don’t have a stable Wi-Fi connection?
A stable connection is crucial for a successful transfer. If you’re experiencing Wi-Fi issues, try moving closer to your router or consider using a third-party tool like MobileTrans that might offer more flexibility with connection options.
Can I transfer my WhatsApp messages and history?
Transferring WhatsApp data requires a separate process. You’ll need to use WhatsApp’s own transfer feature or a dedicated tool, as it doesn’t move with your other data through standard transfer methods.
What should I do if the transfer fails or gets interrupted?
First, don’t panic! Restart both phones, ensure they’re charged, and check your Wi-Fi connection. You can start the process again. If problems persist, consider using a computer-based transfer tool as an alternative solution.
Do I need to keep my Android phone after the transfer?
It’s wise to keep your old device for a few days to verify all your information transferred correctly. Once you’re confident everything moved successfully, you can reset or repurpose your Android phone.
Can I transfer data from Android to iPhone without using Wi-Fi?
While most methods require Wi-Fi, some third-party apps like MobileTrans might offer alternative connection options. You could also transfer specific files manually using Google Drive or email for smaller data transfers.